Building a push message
In this topic:
- Building your push message
- Adding rich media content
- Deep linking
- Category
- Playing a sound
- Key/value pairs
- A/B testing
- Preview as
- Next steps
Building your push message
Many parts of the push message builder in Localytics are optional, so pick and choose those that will help your push message be the most relevant to your audience.
If you are building push messaging across Android and iOS apps, the message builder displays the app icons ![]() at the top of the page. To build a separate message for each app, select
at the top of the page. To build a separate message for each app, select  Android or
  iOS.
iOS.

To apply the same content (title, message body, rich media, and deep linking) to messages for both apps, select the Link content across both apps slider to enable it. To remove sharing between both apps, select the slider again to disable it. If you enable linking again, any changes to the currently selected app will be applied to the linked app.
Tip: Select the checkbox on the left to unlink a section and then enter new content for that section only; for example, you can specify a separate subtitle for each message and still retain the shared content in all the other fields.
On the right side of your push Message Builder, you’ll see a preview of what your message looks like as you build it. It’s important to note that this is just a preview. Depending on the phone type and style your message will translate differently (that is, an iPhone plus might look different from a regular iPhone).
Note: This is why we always recommend that you send a test push to your own device (or a coworker’s) if you want to see what a push will look like on a live phone. Here’s a little more on setting up testing on your own device.
-
(Optional) In the top field, enter a descriptive name for your message. This name will let you access the push in the future, and it will help you differentiate across your A/B tests, if you choose to make them.
-
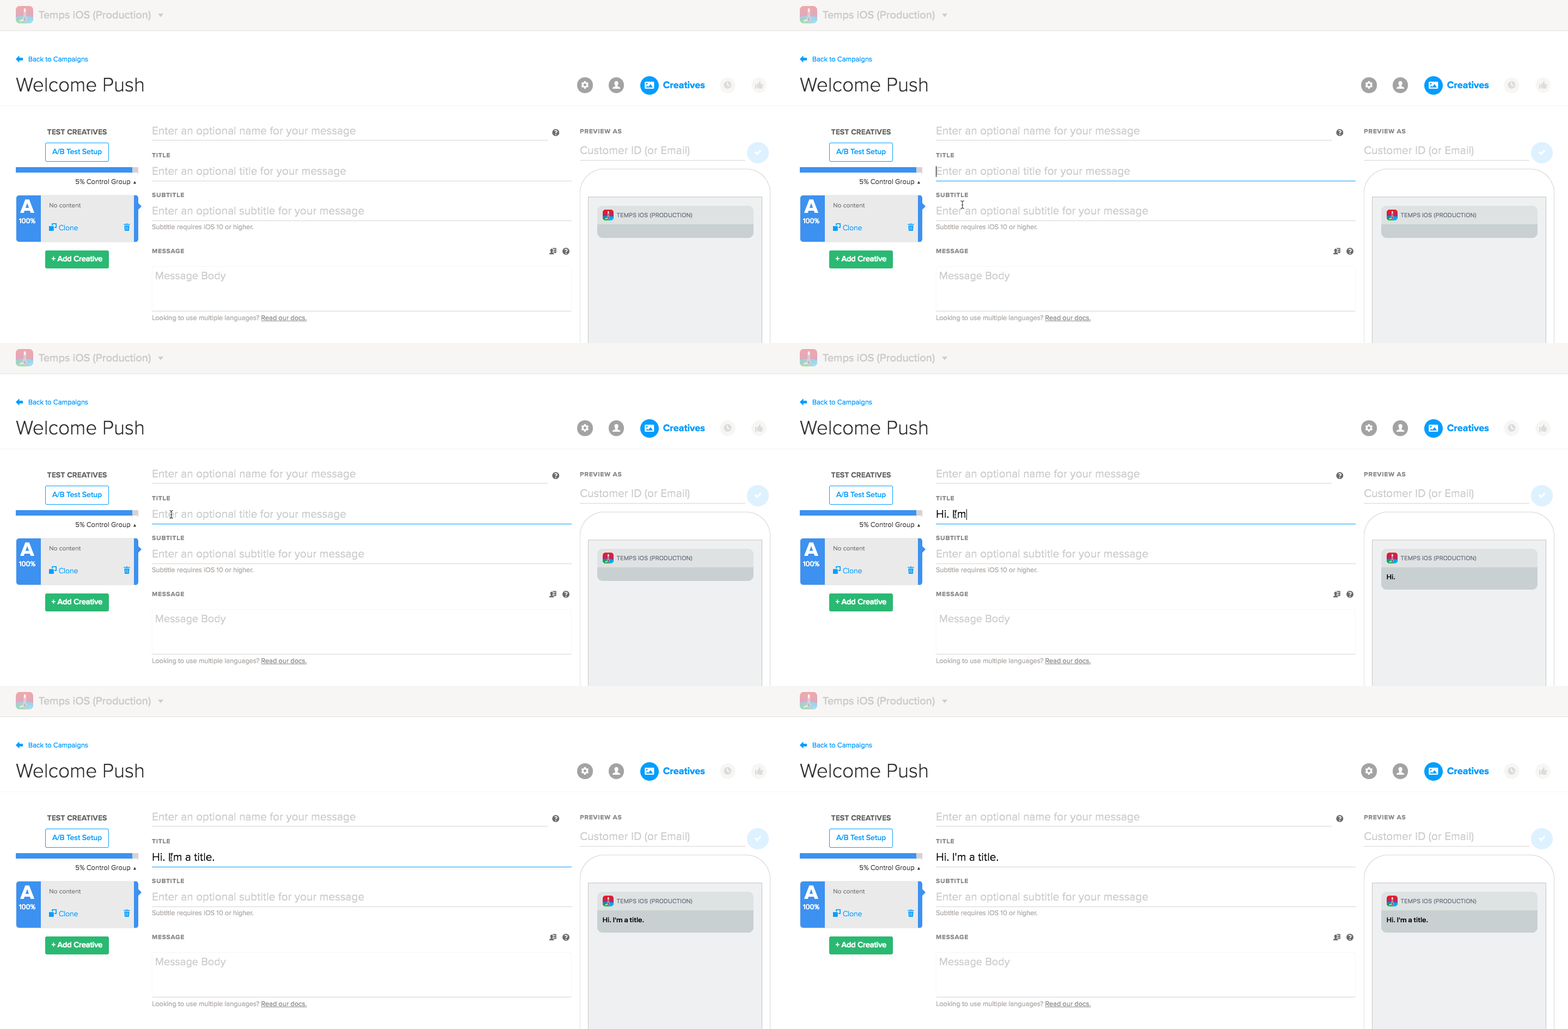
(Optional) In the Title field, add the title header of the message. The title will appear as a bold text above the message.
-
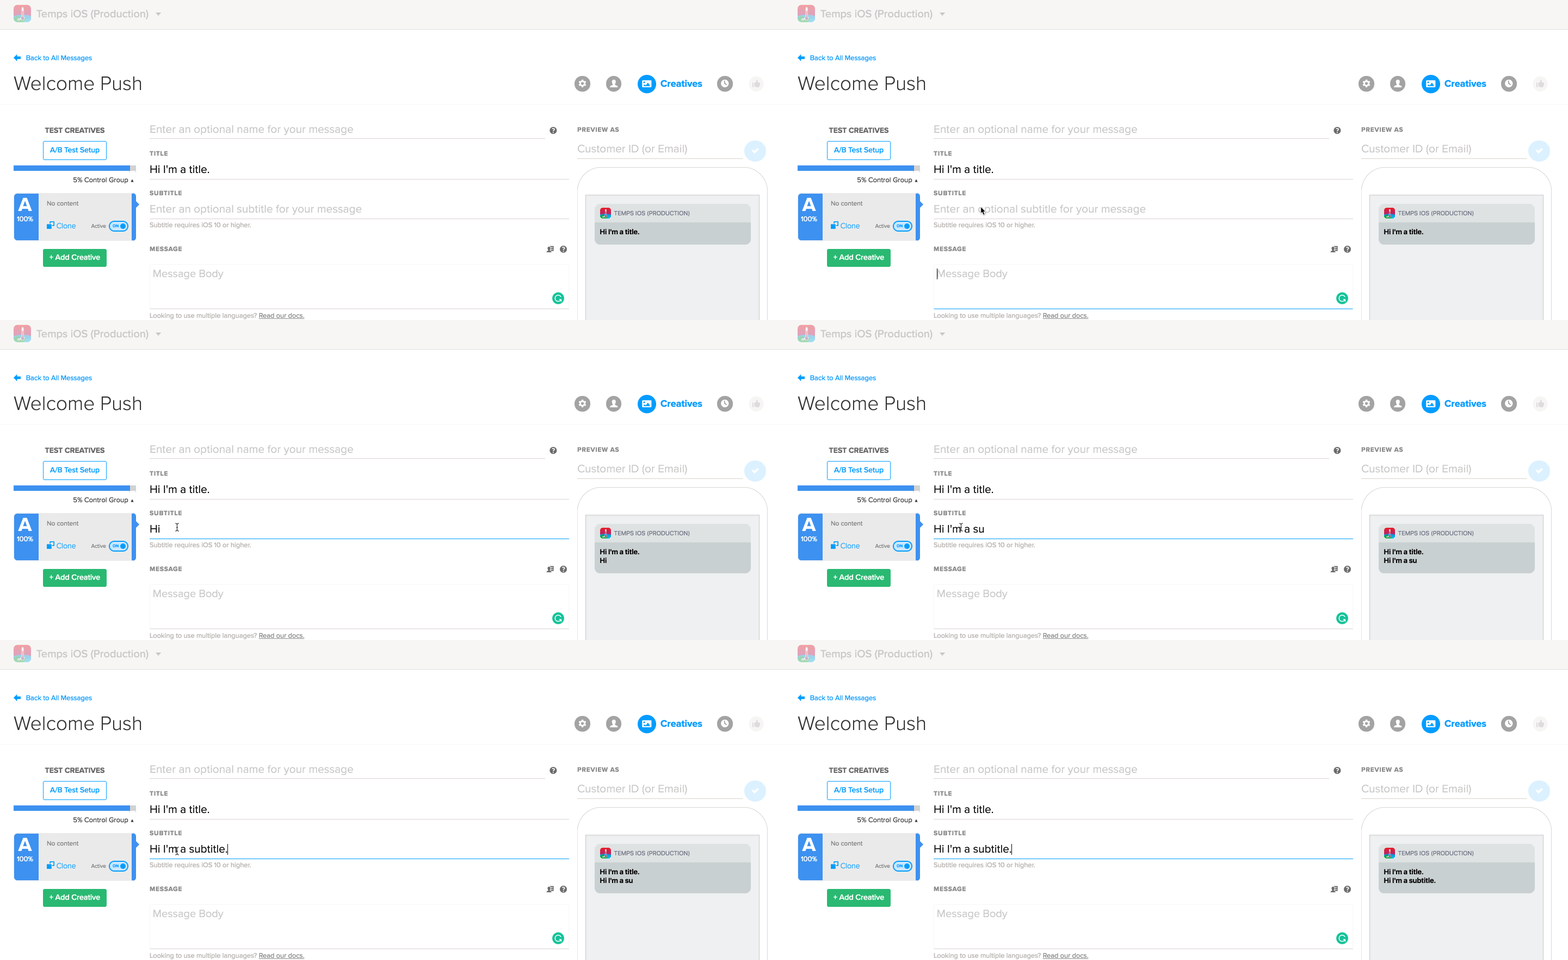
(Optional) In the Subtitle field, add text that will appear below the title, in bold.
-
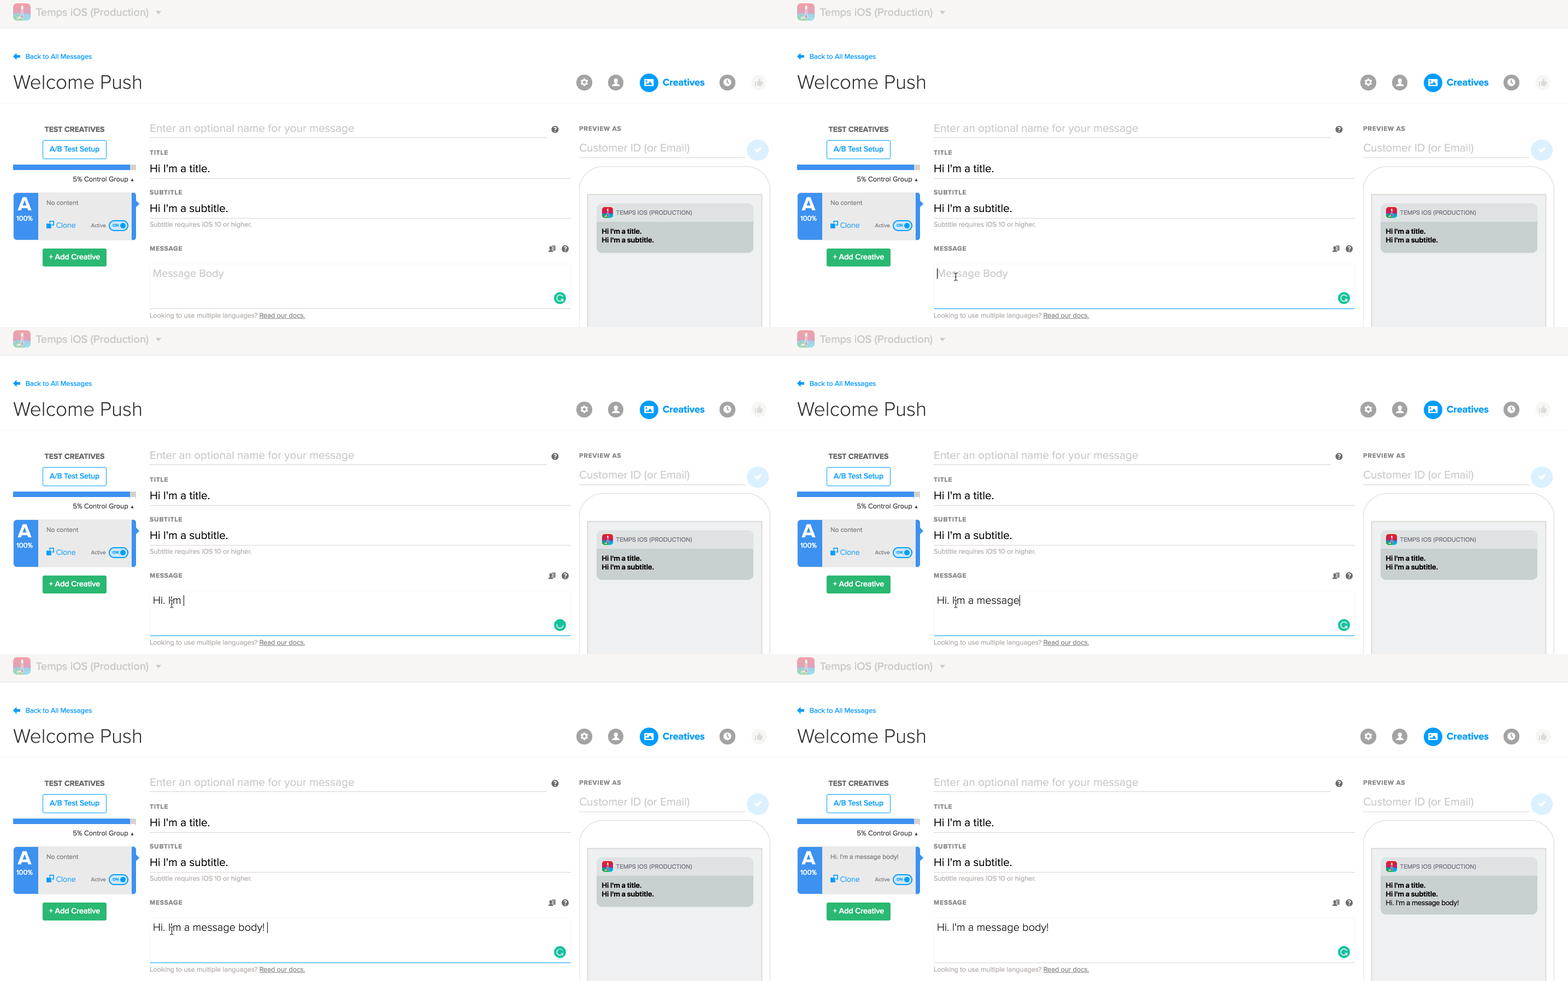
Finally, it’s time for the most important part of your message—the message body! The message body is the only copy that is required.
We do our best to show you an example of what the message will look like on the right. It’s important to note that there is no official character limit for the message body since each phone and OS will handle the content differently.
This is why it’s important to test the message on a physical device if you’re concerned about truncating your copy.
Emojis
Emojis are a great addition to any push message.  To add an emoji to your message you’ll need to access the emoji keyboard.
|
OS |
Keyboard Shortcut |
Navigation |
|---|---|---|
| Mac |
CMD + CTRL + SPACE |
Edit > Emojis & Symbols |
| Windows |
WINDOWS + . |
Context > Show touch keyboard button |
If you don't have access to the emoji keyboard, you can copy your emojis from an emoji tool like Get Emoji (getemoji.com).
Liquid
Push messages are even better when they’re personal. In your message body, you can use Liquid templating (sometimes called dynamic content) to add anything associated with your user’s profile attributes.
- Select the personalization icon (next to the question mark in the message field) to access the full list of content you can add to your push.
For more information, see Using Liquid.
Adding rich media content
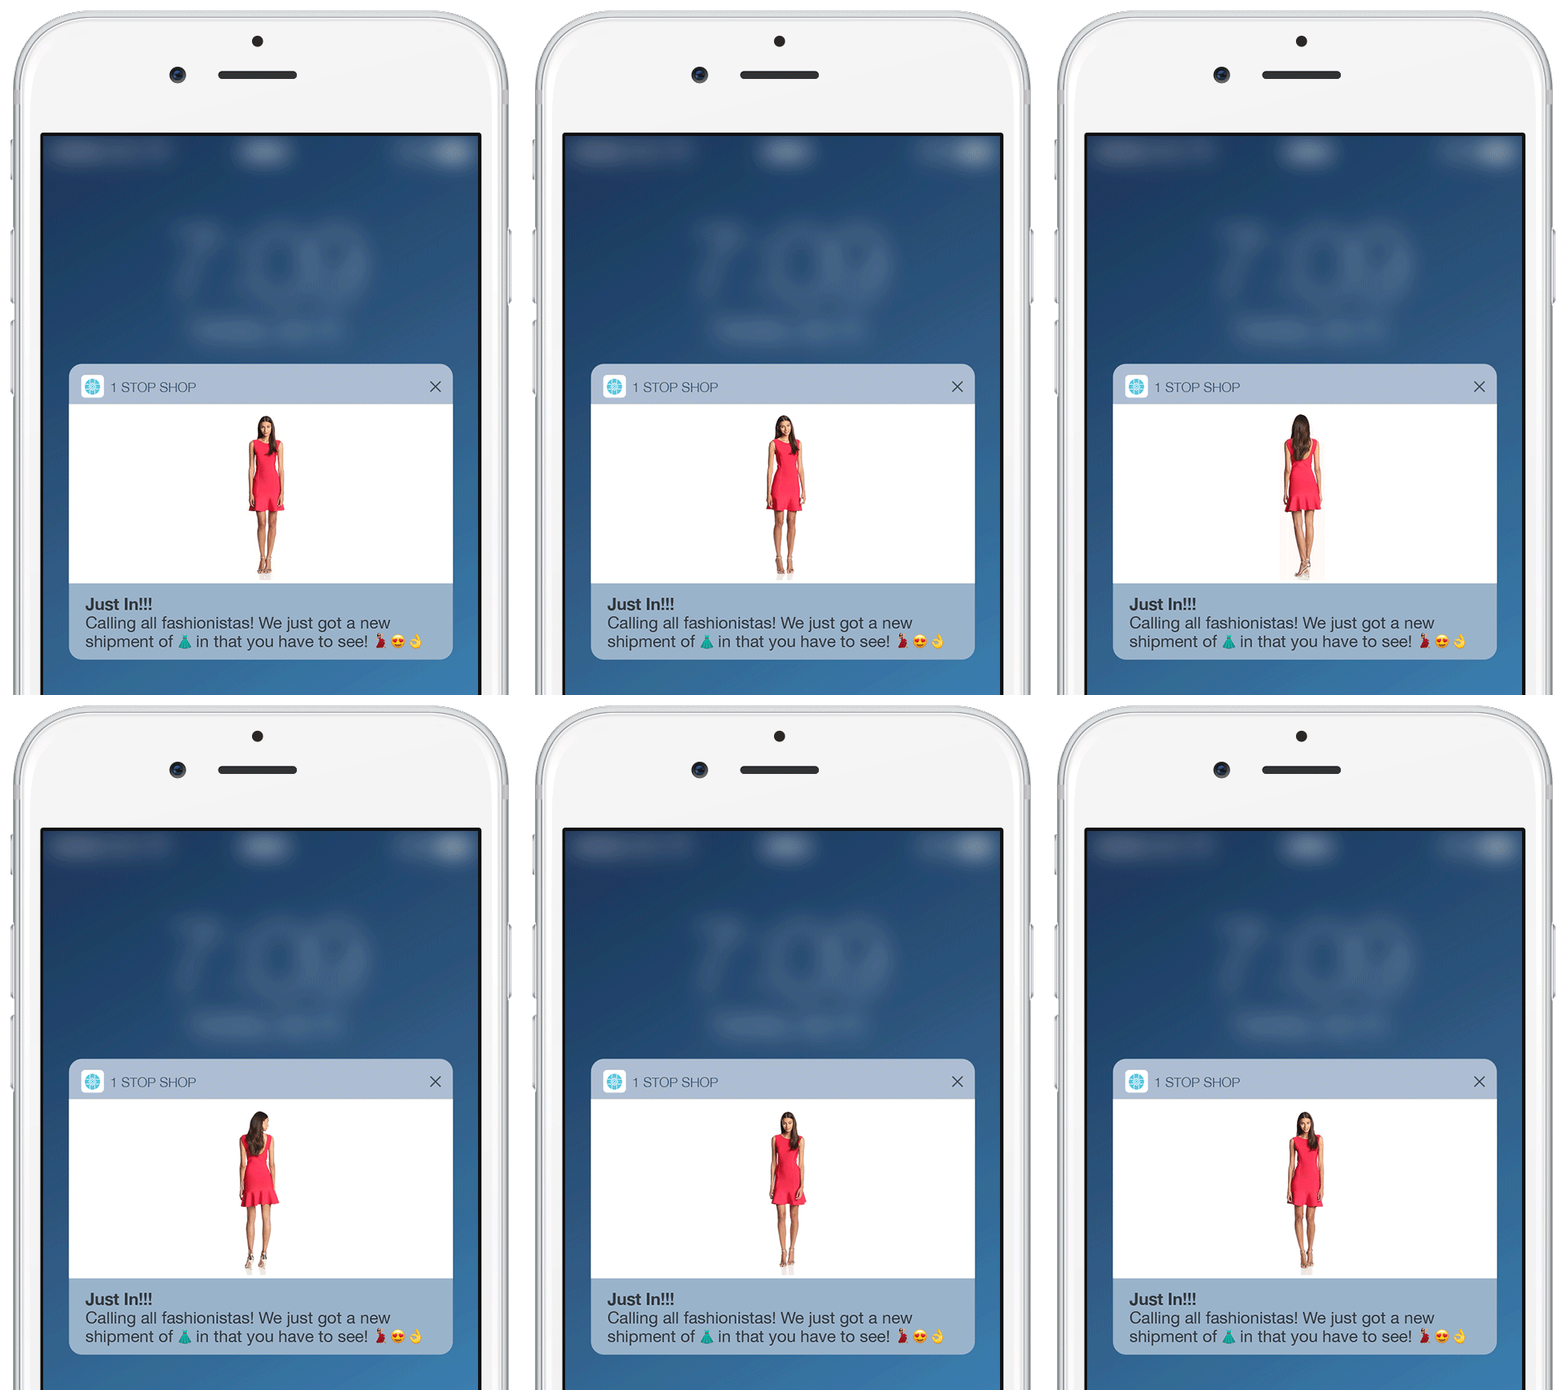
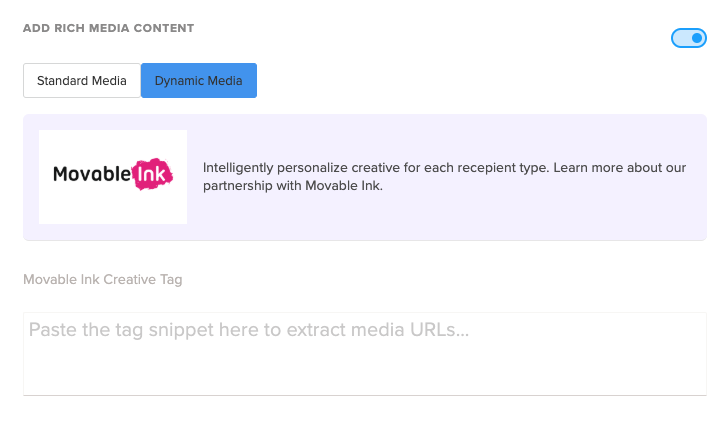
Spice up your push message by adding rich push elements! For devices and SDK versions that support rich media, you can either embed standard rich media content or personalize rich media content dynamically with Movable Ink (movableink.com).
- To add rich media, select the Add Rich Media Content slider to toggle it On.
- Select Standard media or Dynamic media.
Standard media
Localytics doesn't cover image hosting, so you’ll need to upload the image externally. For hosting content, we recommend services like Cloudinary or Amazon S3. Keep in mind HTTPS is a hard requirement for image URLs when targeting iOS devices.
- Paste the direct URL in the image field. The supported file types vary according to the device, but may include the following:
- Images
- GIFs (iOS only)
- Video (iOS only)
You can also use Liquid to serve different rich elements, depending on the user’s profile attributes. For more information, see Using Liquid.
Rich push file size limits
While there are no file size limits for Android, we recommend adhering to the following limitations for iOS:
| File Type |
Size Limit |
|---|---|
| Image |
10MB |
| Animation | 10MB |
| Movie |
50MB |
| Audio | 5MB |
Rich push image dimension limits
The dimension limits vary by device:
- For iOS, the maximum possible dimensions are 1,038 pixels x 1,038 pixels.
- For Android, keep images between a minimum of 800 and maximum of 1,038 pixels.
Dynamic media
Dynamic media supports the Movable Ink Creative Tag.
To find the Creative Tag:
- Log in to your Moveable Ink account.
- Select the appropriate campaign from your Campaigns List.
- Navigate to the Code tab.
- From the sub-navigation, select In-App Messaging.
-
Copy the Creative Tag.
-
In the Message Builder, select the Add Rich Media Content slider to toggle it On, and then select Dynamic Media. Paste the tag in the Moveable Ink field.
Deep linking
If your push message is intended to spur an action with your app, you’ll want to use a deep link.
- If none is specified, clicking through on the push will open your app to the home screen.
- If a deep link is specified, you can direct your users to a specific page within your app from the push. Deep linking is super handy if you’ve got a sale going on for a certain set of items, or if you’d like to direct your users to a specific article.
To add a deep link:
-
Select the Deep Linking slider to toggle it On.
-
Paste your URL link in the field.
You can use Liquid to serve a different URL structure, depending on the profile attributes of the user. For more information, see Using Liquid.
Category
Categories are iOS-specific. They allow you to specify how your push message is categorized by iOS so that you can further customize the action buttons.
Playing a sound
If you’ve got a special message and you’d like to change up the sound normally associated with your push (if you have one), you can choose to play a sound.
You’ll need to make sure the sound is associated with your app—since you’ll be calling the file name from the app’s code.
Just let Localytics know what sound to play by entering the file name (and extension).
Key/value pairs
Key/value pairs are a robust feature.
- Select the Key/Value Pairs slider to toggle it On.
-
Enter one or more key = value combinations.
To access the full list of content, select the personalization icon at the end of the field.
A/B testing
Localytics allows you to A/B test your messages to determine which one your users react more positively to.
- To test a copy of your message, Select Clone.
- To add another creative, select + Add Creative. If you are testing push messaging across Android and iOS apps, select + Add Variant.
You can add up to 10 creatives.
For more information, see A/B testing basics.
We highly recommend you enable a control group. The control group gives you baseline metrics for your push message. This way, you have data around how users act if they’re not messaged.
Preview as
Finally, be sure preview the message.
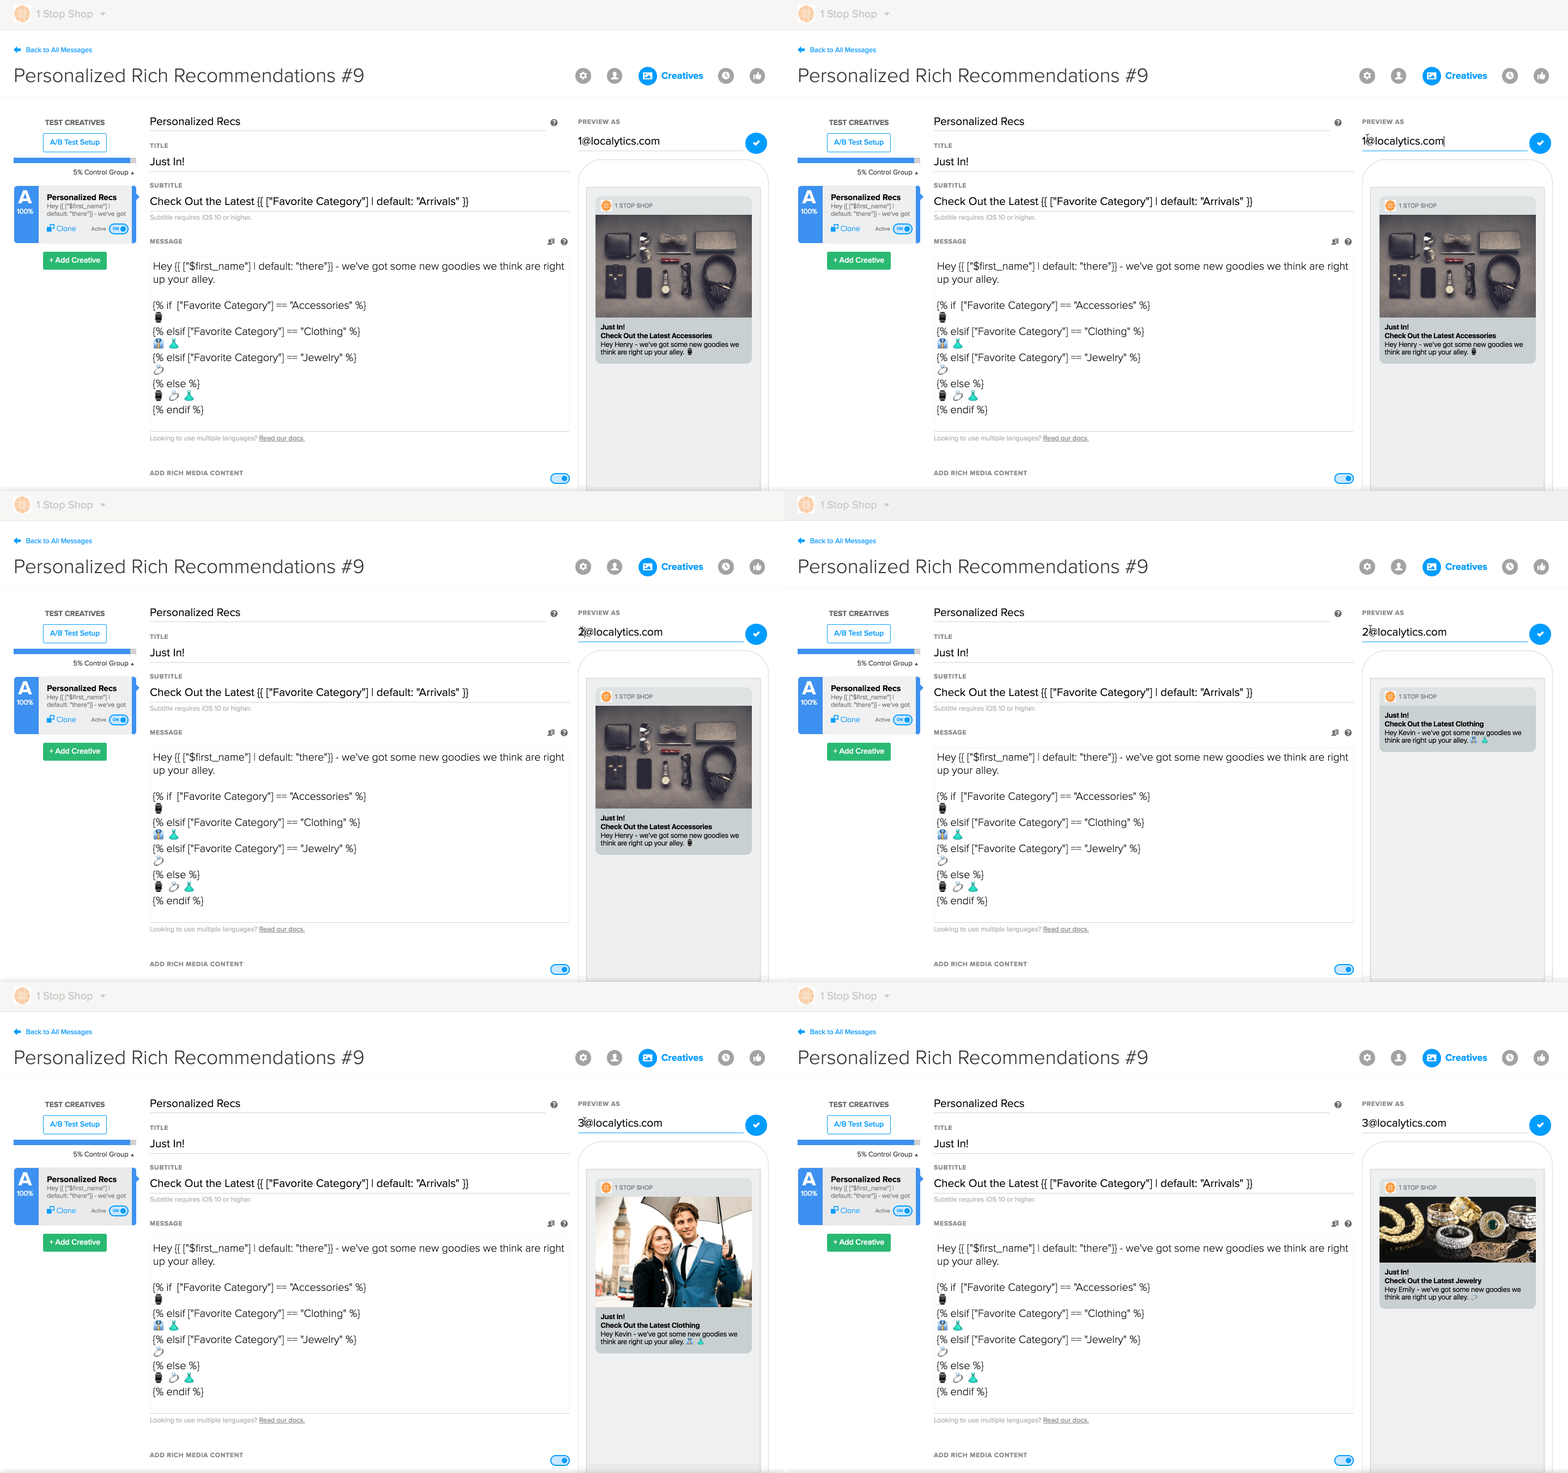
As you build the message, the preview will change to show you what your user will see. If you’re using Liquid templating, you can preview the message as a certain user by typing in an email address or their customer ID.
Next steps
Now that you’ve built your push message, you’ll head to the next step by selecting Continue to Scheduling. For more information, see Scheduling a push message.